Saturday, December 22, 2007

How to Create Water Droplets in Photoshop

It’s been quite a while since my last Photoshop Tutorial guys :), anyway I spent my long holiday to write another tutorial, which is how to create water droplets in Photoshop.

I also included the photoshop action to create this water droplets effect, and there are two kinds of action for creating: bigger water droplets and the smaller one.

This tutorial is very easy for photoshop beginners, but actually there are also another ways of technique to create water droplets using Photoshop. The problem is sometime the water droplets won’t appear to be natural or realistic on the first attempt of applying some filter effect. Filter effects are would likely produce uniform artificially look of water droplets on an object surface. Therefore, as usual...you need to do the retouch to finish this effect. Lets begin now!

Step 1 – Working with a New File

Open a new file of image that has any object, it could be leaf, flower, glass of water or any interesting objects to practice this file.

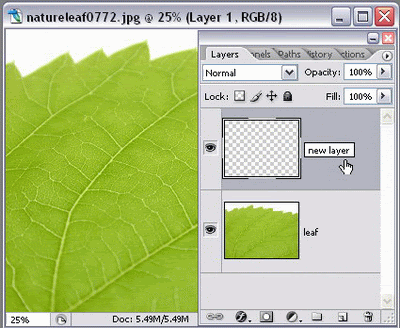
Add new layer and place it above your image object layer. Activate this layer (work on this layer) from now on.
How to Create Water Droplets in Photoshop

Press “D” key to set the color palette into black and white or find the color palette on the Tool Box to set it
How to Create Water Droplets in Photoshop

And fill the new layer with the foreground color which is black.
How to Create Water Droplets in Photoshop


Step 2 – Working with Filters Effect

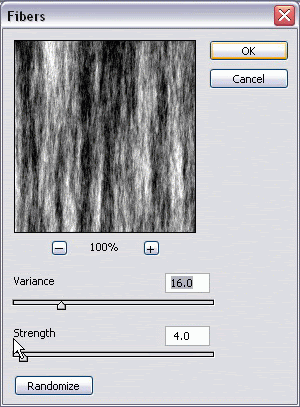
Go to the menu Filter > Render > Fibers and set the value in the dialogue box (Variance: 16.0 ; Strength: 4.0) just like being shown here:
How to Create Water Droplets in Photoshop

Then look again to menu Filter > Texture > Stained Glass, set the value in the option box: Cell Size: 6 ; Border Thickness: 10 ; Light Intensity: 1:
How to Create Water Droplets in Photoshop

Find menu Filter > Sketch > Plaster and set the value in the dialogue box: Image Balance: 20 ; Smothness: 8 ; Light Direction: bottom:
How to Create Water Droplets in Photoshop


Step 3 – Using Magic Wand Tool to Clear the Black Background

How to Create Water Droplets in Photoshop

On the ToolBox, click on magic wand tool and set its Tolerance value: 32.
How to Create Water Droplets in Photoshop

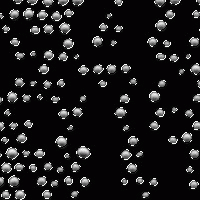
Back to your workspace, working still in new layer that now almost show water droplets; click the black background of your water droplets layer.
How to Create Water Droplets in Photoshop

Press Delete and to remove the selection, just go to menu Select > Deselect or “Ctrl + D”.


Step 4 – Finishing Retouch

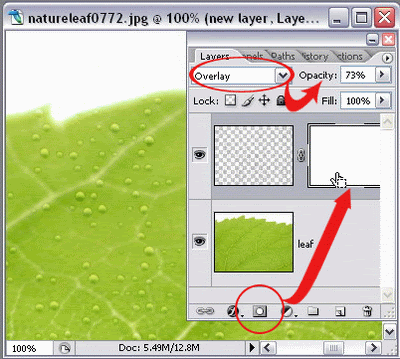
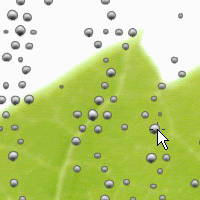
Go to the Layers Panel and set the Blending Mode from Normal to Overlay and set the Opacity to 73%.
How to Create Water Droplets in Photoshop

As I told you in the beginning, to create almost realistic water droplets effect on a surface, you need to do the finishing retouch. You can chose to use layer masking technique or simply erasing the unwanted spot water droplets to do it. Somehow using both of those techniques together would also help ;)

  • Layer Masking Technique
On the layer panel, you can find Layer Mask icon and click it to add layer mask. Click the layer mask which created right next to your water droplets.
How to Create Water Droplets in Photoshop

Find the Brush Tool on the Tool Box, set the opacity somewhere between 35% – 55% and wipe the brush on your workspace, pick some random spot so your water droplets won’t look uniform in shapes again.
How to Create Water Droplets in Photoshop

If you want to make them look almost disappear, especially outside of your object surface, set the opacity of your brush to 100%.

Layer masking gives you easy way blend the water droplets to the object surface without really making them disappear.

  • Eraser Tool
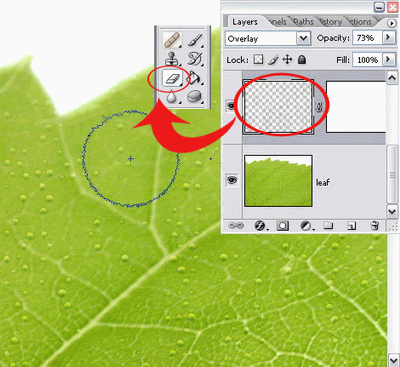
 If you wish to use eraser tool, inactivate the layer mask by clicking on the original water droplets layer which is placed on the left side of the layer mask.
How to Create Water Droplets in Photoshop

Set the opacity and brush tip as you want, the more it gets close to 100% value, then your eraser tool can absolutely erase the water droplets without a trace.


Water Droplets Effect in Photoshop Action


Want to do it quick ;), download this water droplets effect photoshop action to apply on an object surface. There are actually two actions in single file, one is to create bigger water droplets, and the other one is to create the smaller one.

All you need is an image file on a new layer, install the photoshop action and play it. Wait in about 50 secs, and you’ll get these droplets instantly.

Do the Finishing Retouch in Step 4 above to create nice and realistic water droplets effect, and you’re done :)

If you don’t know what Photoshop Action is and how to install it, you can go to my previous tutorial post about Photoshop Action.

Graphic Identity - water droplets.atn (3 KB)
Download Water Droplets in Photoshop Action

Graphic Identity - water droplets.rar (798 B)
Download Water Droplets in Photoshop Action

How to Create Water Droplets in Photoshop

Don’t miss out to download my next photoshop action series by subscribing to my feed!

Related Tutorial Links:

Saturday, November 10, 2007

Quick ways to Create Buttons using Photoshop and Illustrator

These are lists of my old favorite tutorials to create button in quick steps. You can learn both in Photoshop or Illustrator ;)

I’m curious finding quick techniques to create buttons. You can find wide range of button type tutorial such as, rounded corner to glossy button, iconic to nice aqua button and many more. If I find something interesting, I will update this post for sure…

Stay tune and Enjoy !!!

~ Graphic Identity


PHOTOSHOP


Another Tutorial Site - Cool Shiny Green Button

Quick ways to Create Buttons using Photoshop and Illustrator


PinkZAP - RSS Button Variations

Quick ways to Create Buttons using Photoshop and Illustrator

LawnyDesignz - Create a nice feed icon in Photoshop

Quick ways to Create Buttons using Photoshop and Illustrator


Verlee’s Blog - Creating flexible buttons using Photoshop shapes and styles

Quick ways to Create Buttons using Photoshop and Illustrator


ILLUSTRATOR


Graphic Illustration - How to Make Shiny Web 2.0 Button

Quick ways to Create Buttons using Photoshop and Illustrator


N Design Studio - Glassy Button

Quick ways to Create Buttons using Photoshop and Illustrator


Verlee’s Blog - 5 Steps to achieve nice aqua effect

Quick ways to Create Buttons using Photoshop and Illustrator


Bittbox - How to make a Vector Glass Button

Quick ways to Create Buttons using Photoshop and Illustrator


IT Enquirer - Creating a button with a Mesh Gradient

Quick ways to Create Buttons using Photoshop and Illustrator

Saturday, October 20, 2007

How to Install Photoshop Brush Set

Photoshop Brushes usually available in huge size files. This is because some designer made high resolution brushes to get high quality for Printing Standard. The size of each brush can be range between 1500px – 2500px. You can imagine if a series of certain theme brush being compiled together in one file. I’m not talking about hundreds of kilobytes, be patient to download more than 10 megabytes .ABR file in archive folder.

Photoshop Brushes by default, saved in a specific file known as: .ABR file format.

Here is how to install Photoshop Brush:

Download the Photoshop Brush set that you find from my Blog or another site, and extract the Winrar file into ABR file. Save it into your computer hardisk.

Open your Adobe Photoshop and find the Brush Tool
How to Install Photoshop Brush Set

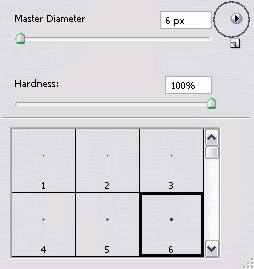
Below the menu bar, you can find Brush Tool menu option and click on tiny arrow that I’ve marked with circle.
How to Install Photoshop Brush Set

You will soon find another Brush Tool submenu option and again, click on tiny arrow that I’ve marked with circle.
How to Install Photoshop Brush Set

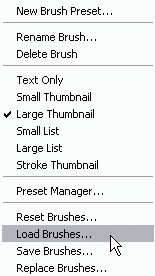
A Brush Tool tray options will shown, and choose Load Brushes.
How to Install Photoshop Brush Set
 
A new set of brushes will be appearing after the previous default brushes.
If you want to have sort of new set brushes only, then you can choose Replace Brushes

That’s it,  you can start to use the brushes now!

I will write a post about my photoshop brush in few days ahead. You can download 7  brushes set in an archive file for free. So don't missed out for my next post by subscribing to my feed!

If you like my tutorial series, please drop a comment and subscribe to my feed!

Monday, October 15, 2007

How to create Swirly Curls in Illustrator

It’s been more than a week since my last tutorial article. Hope you would love this one ;)
Today’s tutorial is different than before. I want to share you an easy tutorial of how to create Swirls in Illustrator.

Decorative swirls are loved nowadays; people always use this style along with natural element into their design. I know that there are lots of tutorials which are sound similar with mine. Well the idea is to create swirly curls, but my technique would probably different than any others. The twirl effect result is having some hazy kind of curls, so I guess it would be interesting.


Step One – Draw a Rectangle

Create a new file and find the Rectangle Tool (press key M) in the Tool Box, then draw a rectangle in any size as you wish.
How to create Swirly Curls in Illustrator

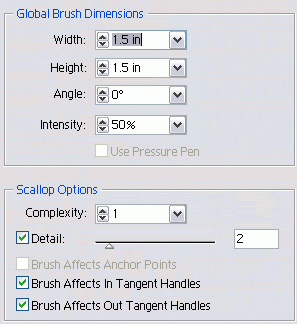
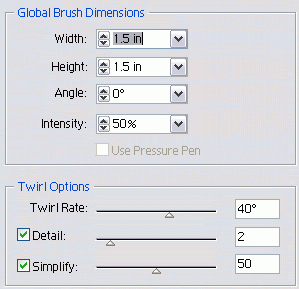
Search a Scallop Tool and double click on it to go to Scallop Tool Option.
How to create Swirly Curls in Illustrator

Set the value that shown below:
How to create Swirly Curls in Illustrator

Back to your rectangle drawing image, and with the Scallop Tool click at one of its corner.
How to create Swirly Curls in Illustrator

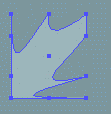
You can click any corner, and here is the result:
How to create Swirly Curls in Illustrator

The corner that you have clicked would have 90 degree corner angle, while the other corners deform into scallop effect.


Step two – Creating Swirly Curls

Find the Twirl Tool and double click on it to go to Twirl Tool Option
How to create Swirly Curls in Illustrator

Set the value that shown below:
How to create Swirly Curls in Illustrator

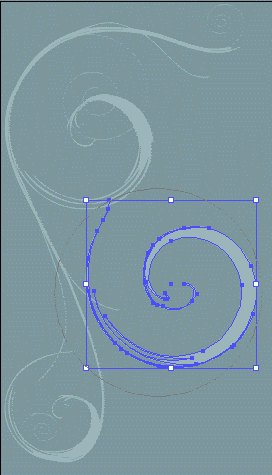
Click at any corner and hold it in few seconds until you see the twirl effect that you want.
How to create Swirly Curls in Illustrator

You should know that in order to get nice effect, this one is little bit tricky. I suggest you to use this twirl tool at any corner point but avoid clicking on the part of deformed rectangle that has 90 degree corner angle. The possibilities of results are countless. It would depend on how long you hold the mouse click. The longer you hold it, and then you will have lots of twirl spirals. Otherwise, simple shape twirl will be created. Spend some times to experiment using different shape to twirl is also useful to try.

If you want to change the twirl shape, you can use Warp Tool (Shift + R), by dragging the end point of your swirly curl.
How to create Swirly Curls in Illustrator

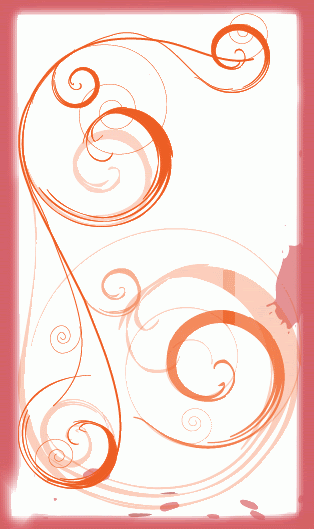
The finished swirly curls:
How to create Swirly Curls in Illustrator

As you see, the swirly curl is created in a single path. You can join them into a group of paths along with other curls and swooshes. Learn how to do it in detail by reading Bittbox’s tutorialHow to make custom swooshes swirls and curls”.

Bittbox also provides series of Illustrator Brushes (free to download) to create swirls and curls using Spiral Tool.

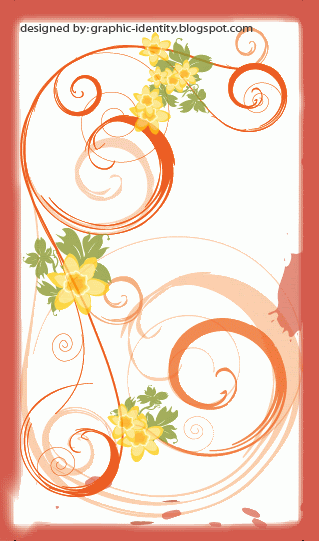
I got another resource that came from Verlee’s Blog, where she uses different techniques to create swirly curls but also worth to visit.

How to create Swirly Curls in Illustrator

If you like my tutorial series, please drop a comment and subscribe to my feed!

Monday, October 8, 2007

Grunge Text Effect in Photoshop Action – Part 3

Another grunge text effect photoshop action to download today ;). You should try this tutorial because this kind of text effect is neater than the Part 1 and Part 2. Still result in destroyed fonts but I exclude random rustic details at the text background which belong in previous version.

Download the Graphic Identity - text grunge 03.ATN (2Kb) inside a WinRAR archive file.

Graphic Identity - text grunge 03.rar (1.2 KB)
Download Grunge Text Effect Photoshop Action


If you don’t know what Photoshop Action is and how to install it, you can go to my previous tutorial post about Photoshop Action.

Don’t miss out to download my next photoshop action series by subscribing to my feed!


Step One – Create a text layer

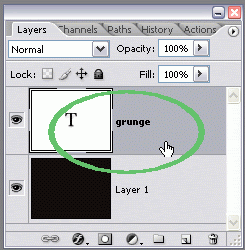
Create a new file and make a text layer. You can add background if you like, just to make it easy, when you want to see a clear grunge effect.
Download Grunge Text Effect Photoshop Action


I choose dark background behind orange text.
Download Grunge Text Effect Photoshop Action

The interesting part about my grunge photoshop action, is that you can blend two colors (better be in contrast) combination. I suggest you to do some small experiment using different color combination to see how they will look for your design.
Download Grunge Text Effect Photoshop Action


Step two – Working with photoshop action

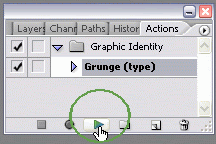
Install the grunge photoshop action, and play selection. Wait in a minute to see the result.
Download Grunge Text Effect Photoshop Action


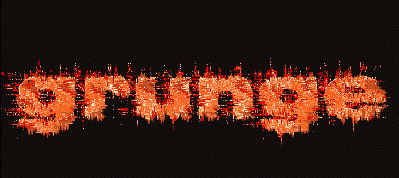
Get the finished Grunge text effect:
Download Grunge Text Effect Photoshop Action


Don’t miss out to download my next photoshop action series by subscribing to my feed!

Sunday, September 30, 2007

Grunge Text Effect in Photoshop Action – Part 2

As I promised you, I will share another grunge text effect photoshop action today. You will find more destroyed fonts in result with the same kind of random rustic details at the text background which I could not control the size to display. For a better text effect, I think you would still need to do the retouch manually and I will show you how.

Download the Graphic Identity - text grunge 02.ATN (2Kb) inside a WinRAR archive file.

Graphic Identity - text grunge 02.rar (1.12 KB)
Download Grunge Text Effect Photoshop Action


If you don’t know what Photoshop Action is and how to install it, you can go to my previous tutorial post about Photoshop Action.

Don’t miss out to download my next photoshop action series by subscribing to my feed!


Step One – Create a text layer

Create a new file and make a text layer. You can add background if you like, just to make it easy, when you want to see a clear grunge effect.
Download Grunge Text Effect Photoshop Action


I choose dark background behind orange text.
Download Grunge Text Effect Photoshop Action

The interesting part about my grunge photoshop action, is that you can blend two colors (better be in contrast) combination. I suggest you to do some small experiment using different color combination to see how they will look for your design.
Download Grunge Text Effect Photoshop Action


Step two – Working with photoshop action

Install the grunge photoshop action, and play selection. Wait in a minute to see the result.
Download Grunge Text Effect Photoshop Action


If you follow the steps correctly, then you will see this effect:
Download Grunge Text Effect Photoshop Action

There is kind of eroded background, which perhaps you need to adjust a little more.

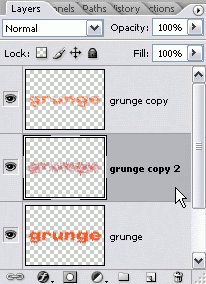
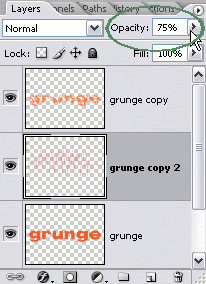
Go to the layer panel, and your default text layer has been rasterized and being duplicated in two times. Be sure to work in grunge copy 2 layer, because that is where the eroded background set.
Download Grunge Text Effect Photoshop Action

Search for eraser tool in tool box, then set its opacity as you like and start to erase unwanted background spot with this tool.
Download Grunge Text Effect Photoshop Action

You can also adjust the layer opacity as you wish to have better background look.
Download Grunge Text Effect Photoshop Action

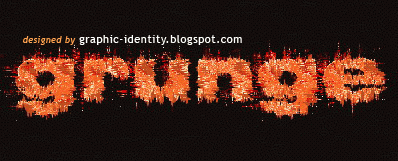
Get the finished Grunge text effect:
Download Grunge Text Effect Photoshop Action

Don’t miss out to download my next photoshop action series by subscribing to my feed!