Sunday, July 8, 2007

Creating Object Reflection on a Surface

"Techie", clean and futuristic looks, can be accomplished using reflection effect. Today I will show you how to create object reflection on a surface in easy steps.

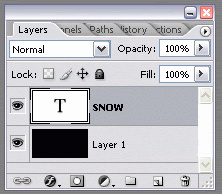
Step 1 - Manage the object

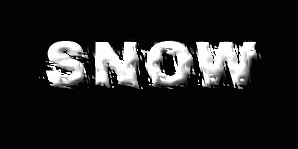
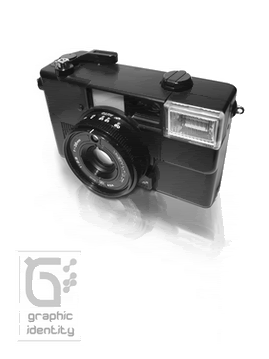
Pick any object in your desire, it can be fonts or image. I use font in this tutorial which you know as Graphic Identity logo. There is important thing that you need to know when you use font as an object editing, and it is quite different if you use image. Font Layer need to be rasterized before you can modify it in further way. To rasterize the font layer you can simply click on the Font Layer and choose Rasterize Type.

Photo Sharing and Video Hosting at Photobucket

Remove the background object, and copy to a new layer with a bigger size area. If you don't know how to delete an object from its background you can read my previous tutorial about Creating a Perfect Selection in Photoshop.

Photo Sharing and Video Hosting at Photobucket

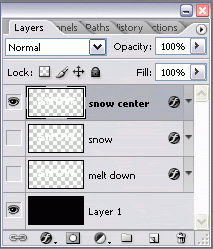
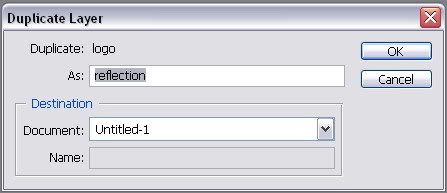
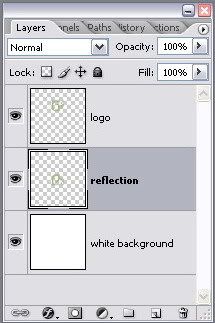
Duplicate the object layer and put "reflection" label so you can easily recognize it. Put the reflection layer right below the initial layer object.

Photo Sharing and Video Hosting at Photobucket

Make a new layer and fill with white background.

Photo Sharing and Video Hosting at Photobucket


Step 2 - Creating Reflection

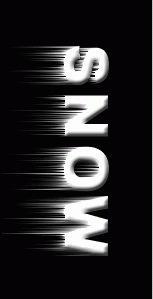
Work on reflection layer and go to menu Edit > Transform > Flip Vertical.
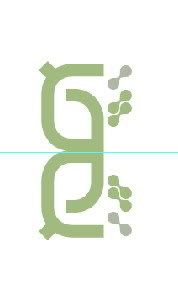
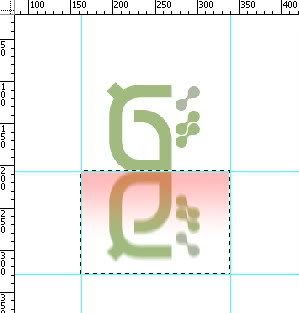
Show guides by choosing menu View > Show > Guides. Drag a guide line from the ruler tool down to bottom of your object. Make it as precise as possible symmetrically, and then move the reflection layer just like the reference picture.

Photo Sharing and Video Hosting at Photobucket

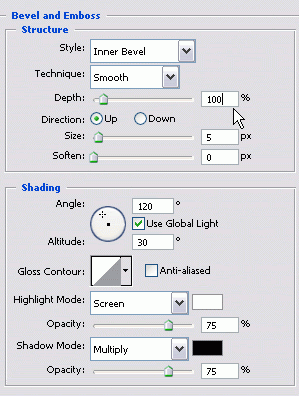
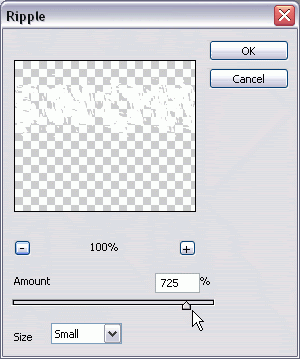
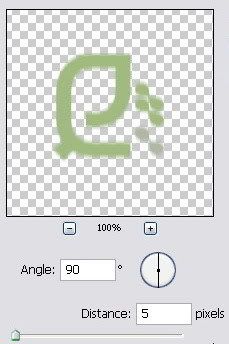
Work still on the reflection layer and go to the menu Filter > Blur > Motion Blur and put the value which showed in the picture.

Photo Sharing and Video Hosting at Photobucket

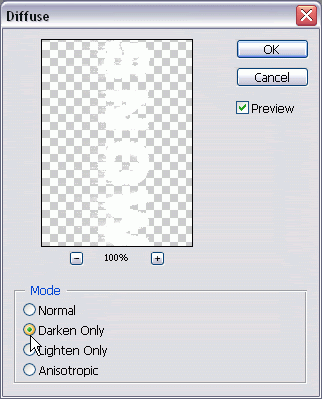
Click at the Toolbox on Edit in Quick Mask Mode tool.

Photo Sharing and Video Hosting at Photobucket

While you are in Quick Mask Mode, select the Gradient Tool.
Photo Sharing and Video Hosting at Photobucket

Drag a rectangle around the reflection layer object. Make sure that the selected area doesn't overlay the area of the initial object layer. It can be a lot easier if you put another guides at the left, right and bellow the reflection layer object.

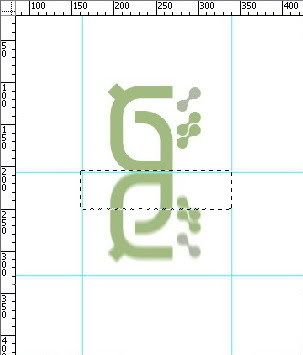
Click from the top of selected area, and drag about half way down before you release the mouse-cursor. If you follow this tutorial in a right way, you should have something in your work space which looks like this.

Photo Sharing and Video Hosting at Photobucket

Back to the Standard Mode which you can find in the Tool Box. After that press Delete button on the keyboard.

Photo Sharing and Video Hosting at Photobucket

Photo Sharing and Video Hosting at Photobucket


Step 3 - Optimizing Reflection

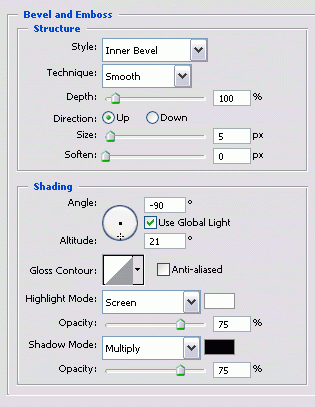
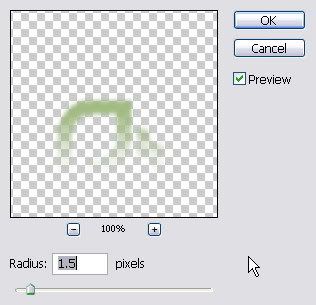
Your creation is almost done, but you must optimize the reflection layer in just few steps away. Go to the menu Filter > Blur > Gaussian Blur and enter the value which showed in the picture below:

Photo Sharing and Video Hosting at Photobucket

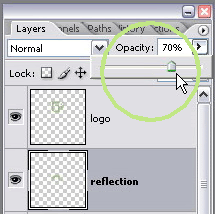
Adjust the opacity of reflection layer, as you see here I reduced 70% of the opacity so the layer transparency will show deep smooth effect as reflection on a surface.

Photo Sharing and Video Hosting at Photobucket

Clear the guide and well done!!

Photo Sharing and Video Hosting at Photobucket


IMPORTANT TIPS:
  • This tutorial only shows how to make reflection of an object which is absolutely in straight front elevation. For an object in perspective stand, you will need to transform the reflection layer object after you flip it vertically. It should be rotated and even distorted to get good perspective reflection effect.

    Photo Sharing and Video Hosting at Photobucket
  • Some object that has dark heavy color such as black, deep blue, etc, will look much better if we pick a contrast color as its background (white, light grey). It would works otherwise for object with lighter color. So you'd better doing some experiments when choosing colors for background.

    Photo Sharing and Video Hosting at Photobucket

Snow Text Effect

Step 1 - Rasterize Type

Fill a new layer as a background with black color, and make another new layer.
Work on this new layer and use Type Tool at the Toolbox to type "SNOW" . Don't forget to set the font in white color.
Photo Sharing and Video Hosting at Photobucket

Go to the layer panel and then working still on your Type Layer then right click on that layer and choose Rasterize Type.
Photo Sharing and Video Hosting at Photobucket

Photo Sharing and Video Hosting at Photobucket

Step 2 - Duplicate Layer

Add style on the type layer by clicking Add a Layer Style icon at the bottom of layer panel. Choose Bevel and Emboss at the Add Layer Style tool menu tray list.
Photo Sharing and Video Hosting at Photobucket

Set the value that shown in the image below:
Photo Sharing and Video Hosting at Photobucket

Work still on the type layer, and right click to choose duplicate layer. Repeat this step again one time.
Photo Sharing and Video Hosting at Photobucket

You got three typical layers now. Add label on each layer differently and put them in the right order just like showed in the illustration. You can do it by double clicking each layer till you see a space to write a text show up.

Work on "Snow Center" layer now and turn off other snow layers visibility by clicking their 'eyes' icon at the left side of layer panel.


Step 3 - Creating Snow Effect at the Center of the Text


Go to the Filter > Distort > Ripple, and put the value showed below:
Photo Sharing and Video Hosting at Photobucket

You would see the result like this:
Photo Sharing and Video Hosting at Photobucket

Click at Toolbox for Edit in Quick Mask Mode tool.
Photo Sharing and Video Hosting at Photobucket

While you are in Quick Mask Mode, select the Gradient Tool.
Photo Sharing and Video Hosting at Photobucket

Select all or press down ctrl + A keys and drag a line from top to bottom just half part of your image space and the result will look like this:
Photo Sharing and Video Hosting at Photobucket

Back to the Standard Mode which you can find in the Tool Box. After that press Delete button on the keyboard.
Photo Sharing and Video Hosting at Photobucket

Turn on snow layer visibility now, but you still need to work on Snow Center layer and refine it using erasing tool.
Photo Sharing and Video Hosting at Photobucket

Make it as natural as possible, so you can almost see snow effect at the center of the text.
Photo Sharing and Video Hosting at Photobucket


Step 4 - Creating Snow Melting Down Effect

Activate Melt Down layer and turn off the two other layers visibility. Then look up to the menu Image > Rotate Canvas > 90o CW to rotate the canvas.
Photo Sharing and Video Hosting at Photobucket

Go the menu Filter > Stylize> Wind and then repeat that step again for one time.
Photo Sharing and Video Hosting at Photobucket

Look up to menu Filter > Sharpen > Sharpen Edges to get more sharp effect on the melting snow. We would need other effect so we should go to the menu Filter > Brush Stroke >Accented edges.


The melting down snow will look like a water drop, but much thicker than water. We need to add more effect on it. But first, rotate the image canvas back by entering menu
Image > Rotate Canvas > 90o CCW.
Photo Sharing and Video Hosting at Photobucket

Go to the menu Filter > Stylize >Diffuse and choose the option Darken Only:
Photo Sharing and Video Hosting at Photobucket


We are about to finish this tutorial, but you need to set up the bevel and emboss style that will do in your effect layers (snow center and melt down layers) . Insert values shown in the picture below for that each layer.
Photo Sharing and Video Hosting at Photobucket


Activate all the three layers together including the black background, and here is the result:
Photo Sharing and Video Hosting at Photobucket