Today’s tutorial is easy but it’s different than before, because I included the Photoshop Action (.ATN) also. Glowing in the Dark is somehow a beginner can do in 3 minutes (less or more), but Photoshop Action will do this effect less than 1 minute ;)
Download, extract the file and load it to your Photoshop Action Panel.
If you don’t know what Photoshop Action is and how to install it, you can go to my previous tutorial post about Photoshop Action.
Glowing Text Effect.rar (486 B)
This is a quick one, all you need to prepare is dark background color (black, dark blue, etc.) and of course some text to edit on your new canvas. Just remember to put them in separate layer, which are background layer and text layer.
Font: Rough Draft by Harold Lohner
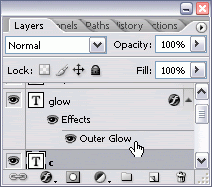
Activate the text layer, and add layer style. This first step is also needed to execute the Glowing in the Dark Text Effect Photoshop Action.
After you click the add layer style, you can see a tray menu show up and choose Outer Glow. Set these values at once.
You can pick any color of Outer Glow Structure. I use the default set, which is pale yellow.
Customize the spread and size and any technique of glows in Outer Glow Elements.
Outer Glow Quality provides you a tool to set the Contour, Range and Jitter and chek Anti-aliased option if you want smooth result.
Click OK button and all done.
Monday, August 27, 2007
Spinning Wind Effect in Photoshop Action
Spinning Wind effect is my second Photoshop Action that I will share with you for free.
Download, extract the file and load it to your Photoshop Action Panel.
If you don’t know what Photoshop Action is and how to install it, you can go to my previous tutorial post about Photoshop Action.
Spinning Winds.rar (545 B)
Getting start is easy. Go to the toolbox and find switch color palette for background and foreground. Set the background color in black, and you can choose whatever color as foreground.
Create a new canvas work in any size and fill the canvas in black, when you set with your Photoshop Action to make this effect, just click play selection button below the panel.
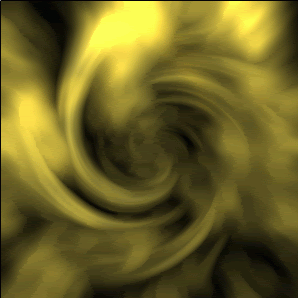
Here is the result:
Wednesday, August 1, 2007
Photoshop Actions
What is Photoshop Actions?
Did you know that Photoshop Action is a special feature of Adobe Photoshop that can record series of executed command you have made to your design work? This feature can easily create your design within a click in a minutes or less after you customize it. You can have several of Photoshop Actions saved in your computer hardisk. Photoshop Actions is a very handy tool for digital lab, photographer, advertising or publishing agency to create the same special effect style over and over, and of course, this feature is designed to maintain your effective work schedule.
Photoshop Action droplets file can be saved in .atn format after you made series of commands recorded. It would remain there, in actions and history panel and stop to work after you save your work design.
What is the difference between Photoshop Actions and History?
We know that we can undo some commands that are made in limited number in history panel. The number series of commands depend to the scratch disk customization. Photoshop can only record 20 commands in default. This history feature would consume big memory space in your computer’s hardisk, not to mention if we work in multiple work files. But when we save them, the history will begin to count commands from start again.
Photoshop action can do better since we can save every of command series for certain effect style, given each of them specific name to easily recognize for future needs. We can use it over and over so we don’t have to remember each command we put to our design work file to create certain effect style ;D Cool isn’t it?
How to begin Photoshop Action
Go to the Window > Actions to display action panel or press Alt+F9
for shortcut.
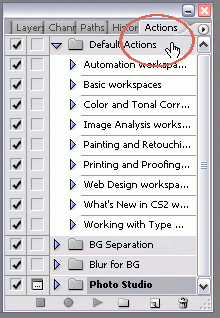
On the top right of action panel, find a tiny arrow and click to find out each menu which is correspond to actions customization.
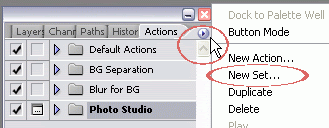
Have a new file set, and go to action panel submenu (click the tiny arrow at the top of action panel) to begin recording your commands by clicking new set, and give any label to fit your design style. I want to create bevel text so there I typed “bevel text” and click OK button.
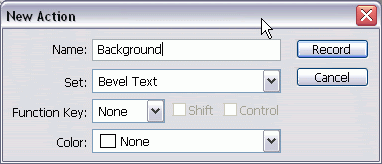
Then back to action panel submenu and choose new actions. Give any action label which placed inside your set. You can have more than one action in a single set. This is good if you need to do step by step playback.
You can also set certain function key for shortcut command action and choose color which helps you a lot when you want to display your action panel in Button Mode.
Click Record to start recording.
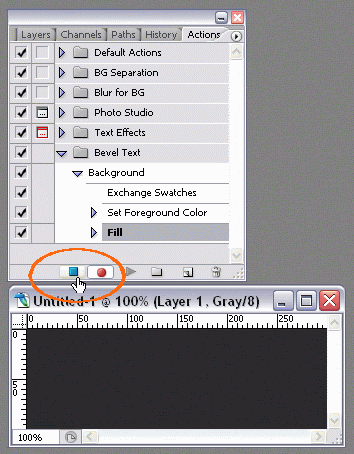
To stop recording click the stop button and you can start a new action series needed for your own design which I have explained previously. Then you just need to continue this step using any tools.
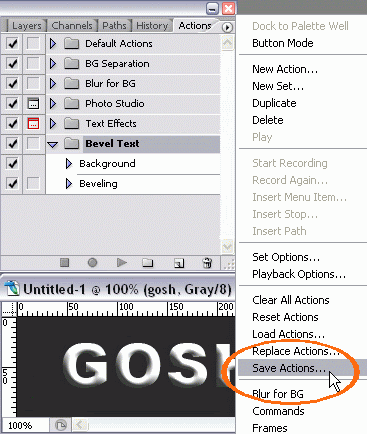
How to Save and Load .ATN File
When you finish your entire design, go to the action panel submenu and choose save action. You can save it anywhere in your computer hardisk. Photoshop will save it in
.ATN format by default and you can load action anytime you’ll need it from action panel submenu option.
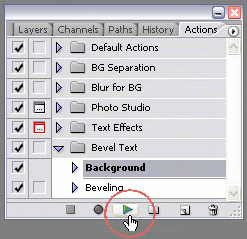
To execute these sorts of actions, simply click one of them and play action.
There are other options which are toogle dialogue on/off and toogle item on/off. Toogle dialogue on/off functions is to give option to modify each action in step by step commands if it is on. It works automatically in one click (without any modifying prompt options) when it is off.
Toogle item on/off function is to lock or hide the certain action.
IMPORTANT TIPS :
- Not all tools feature and image retouching process can be recorded; there are some limitations when your design workspace needs direct handling such as brush tools, or clone stamp on certain spot.
- You must know where your action begins. For example: you can not make an action commands series to draw a new canvas work file since you didn’t set it initially in your action. There will be a box warning option shown if you continue to execute the action. Make a new file will solve this problem. Otherwise if you have set it initially, your workspace canvas size and all things correspond into it, can not be changed or being fixed out.
Subscribe to:
Posts (Atom)