
Fill a new layer as a background with black color, and make another new layer.
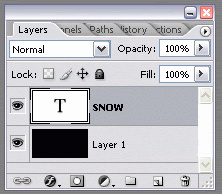
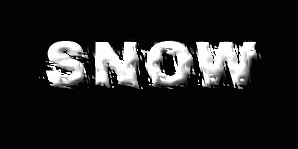
Work on this new layer and use Type Tool at the Toolbox to type "SNOW" . Don't forget to set the font in white color.

Go to the layer panel and then working still on your Type Layer then right click on that layer and choose Rasterize Type.

Step 2 - Duplicate Layer
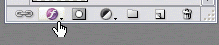
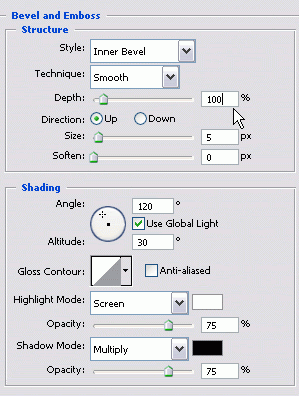
Add style on the type layer by clicking Add a Layer Style icon at the bottom of layer panel. Choose Bevel and Emboss at the Add Layer Style tool menu tray list.
Set the value that shown in the image below:
Work still on the type layer, and right click to choose duplicate layer. Repeat this step again one time.
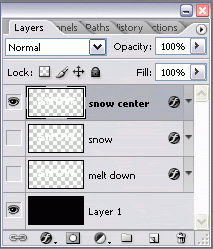
You got three typical layers now. Add label on each layer differently and put them in the right order just like showed in the illustration. You can do it by double clicking each layer till you see a space to write a text show up.
Work on "Snow Center" layer now and turn off other snow layers visibility by clicking their 'eyes' icon at the left side of layer panel.
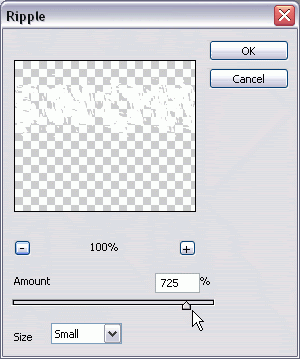
Step 3 - Creating Snow Effect at the Center of the Text
Go to the Filter > Distort > Ripple, and put the value showed below:
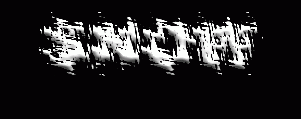
You would see the result like this:
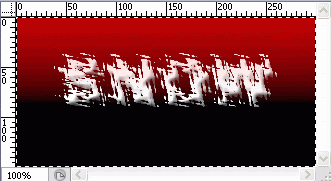
Click at Toolbox for Edit in Quick Mask Mode tool.

While you are in Quick Mask Mode, select the Gradient Tool.

Select all or press down ctrl + A keys and drag a line from top to bottom just half part of your image space and the result will look like this:
Back to the Standard Mode which you can find in the Tool Box. After that press Delete button on the keyboard.

Turn on snow layer visibility now, but you still need to work on Snow Center layer and refine it using erasing tool.
Make it as natural as possible, so you can almost see snow effect at the center of the text.
Step 4 - Creating Snow Melting Down Effect
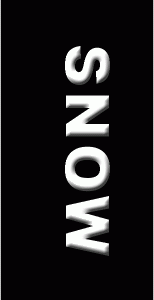
Activate Melt Down layer and turn off the two other layers visibility. Then look up to the menu Image > Rotate Canvas > 90o CW to rotate the canvas.
Go the menu Filter > Stylize> Wind and then repeat that step again for one time.
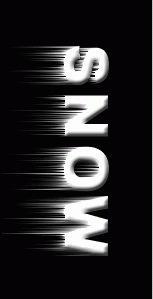
Look up to menu Filter > Sharpen > Sharpen Edges to get more sharp effect on the melting snow. We would need other effect so we should go to the menu Filter > Brush Stroke >Accented edges.
The melting down snow will look like a water drop, but much thicker than water. We need to add more effect on it. But first, rotate the image canvas back by entering menu
Image > Rotate Canvas > 90o CCW.
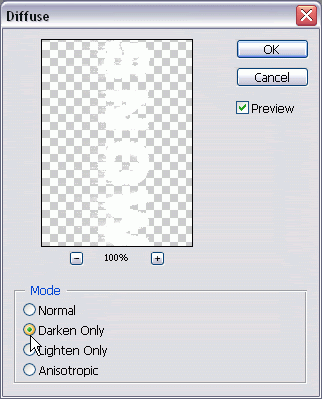
Go to the menu Filter > Stylize >Diffuse and choose the option Darken Only:
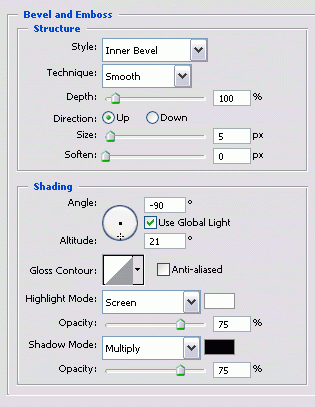
We are about to finish this tutorial, but you need to set up the bevel and emboss style that will do in your effect layers (snow center and melt down layers) . Insert values shown in the picture below for that each layer.
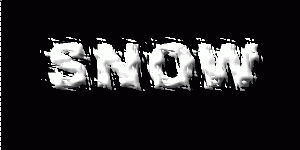
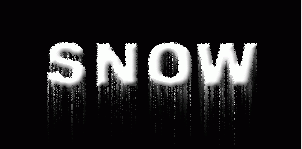
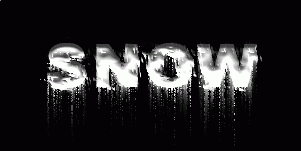
Activate all the three layers together including the black background, and here is the result:
WOW, Thanks!
ReplyDeleteInteresting tutorial.
ReplyDeleteLet me give a tip about snow test.
With just some clicks and without to be a designer you can get nice snow/ice text here:
http://www.picturetopeople.org/p2p/picture_to_people.p2p/text_effects
There you click "ice" in the left side menu and choose the effect that fits your need best.
To learn how to use it, you can go here:
http://www.picturetopeople.org/how_to_use.html
Hi LEONARDO,
ReplyDeleteReally appreciate your comment, thank you :)
Unfortunately, I am not able to visit the site links you gave. I think they're seemed to be sort of broken links. Could you please send us the right resource links if you have the chances.
Thank you again!
Hi, friend.
ReplyDeleteI tested the links again and they worked for me.
These pages have many accesses per day. I don't know why they didn't worked for you.
Could you please try again?
Or so, start from the main page there: www.picturetopeople.org
Thank you!